A comprehensive guide on how to create a weather widget in Next.js

As a full-stack web developer and technical writer, I bring a unique combination of skills to every project I work on. With experience in both web development and technical writing, I can develop custom solutions that are not only high-performing and user-friendly but also well-documented and easy to maintain. I have expertise in a wide range of programming languages and technologies, including HTML, CSS, JavaScript, React, Node.js, Python, and SQL, as well as technical writing tools and techniques. I am committed to delivering projects on time and within budget while ensuring that the final product meets the unique needs of the client. Let's work together to create something amazing that meets your needs and exceeds your expectations.
Introduction
Websites and programs no longer function without weather widgets, which provide consumers with instantaneous access to weather data. This detailed tutorial will teach us how to use the Next.js framework to build a highly functional and adaptable weather widget. The demand for attractive and useful widgets that can be seamlessly integrated into dynamic web applications is growing.
Overview of Weather Widgets
Widgets that display the current weather and forecasts on a webpage are known as weather widgets. For websites that focus on geography or travel, they not only improve the user experience but also offer functionality.
Importance of Weather Widgets in Web Development
There are more practical uses for weather widgets in web development than just making the site look nicer. It provides helpful, location-based data, which adds to a user-centric experience. Weather widgets improve the functionality of web apps in many different sectors, making them more useful for travel planning, daily forecast checking, and general news consumption.
Introduction to Next.js for Building Dynamic Web Applications
As a React-based framework, Next.js makes it easy for developers to create powerful and efficient online apps. Because of its modular design and server-side rendering capabilities, it is perfect for making widgets that can respond to user input. Our weather widget now works flawlessly for users on any device, regardless of network circumstances, thanks to Next.js.
Setting Up the Next.js Project
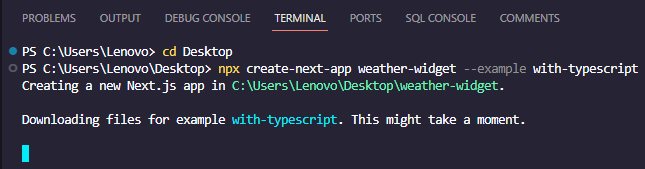
Navigate to your desired location in the VS code and run the following command, either using npx or yarn, to set up the project:
npx create-next-app weather-widget
yarn create next-app weather-widget
Next, when prompted, make use of the parameters that are listed below:
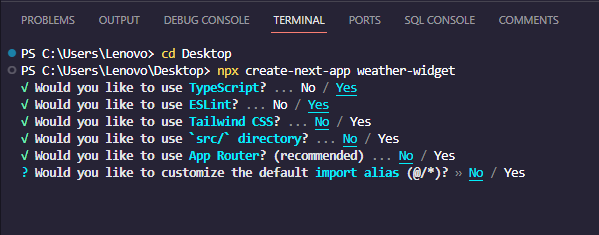
After it finishes installing, use the following commands to open the project in VS Code:
cd weather-widget
code .
Creating a weather widget component
Make a new folder named components in your project root folder. In that folder, create a file called weatherWidget.tsx. Add the following code to it:.
import React, { useState, useEffect } from 'react';

import styles from '../styles/widget.module.css';

interface WeatherWidgetProps {
  city?: string;
  coordinates?: { lat: number; lon: number };
}

interface WeatherData {
  name: string;
  main: {
    temp: number;
    feels_like: number;
  };
  weather: {
    description: string;
    icon: string;
  }[];
}

const WeatherWidget: React.FC<WeatherWidgetProps> = ({ city, coordinates }) => {
  const [weatherData, setWeatherData] = useState<WeatherData | null>(null);

  useEffect(() => {
    const fetchData = async () => {
      try {
        let query = '';

        if (city) {
          query = `q=${city}`;
        } else if (coordinates) {
          query = `lat=${coordinates.lat}&lon=${coordinates.lon}`;
        } else {
          console.error('Please provide either city or coordinates.');
          return;
        }

        const response = await fetch(`/api/weather?${query}`);
        const data: WeatherData = await response.json();

        setWeatherData(data);
      } catch (error) {
        console.error('Error fetching weather data:', error);
      }
    };

    fetchData();
  }, [city, coordinates]);

  console.log(weatherData);

  return (
    <div className={styles.weatherWidget}>
      {!weatherData ? (
        <div>Loading weather ...</div>
      ) : (
        <>
          <h2>{weatherData.name}</h2>

          <p className={styles.weather}>{weatherData.weather[0].description}</p>

          <div className={styles.currentWeather}>
            <img
              src={`https://openweathermap.org/img/wn/${weatherData.weather[0].icon}@2x.png`}
              alt={weatherData.weather[0].description}
            />
            <div>{Math.round(weatherData.main.temp)}°C</div>
          </div>

          <p className={styles.feelsLike}>
            Feels like: {Math.round(weatherData.main.feels_like)}°C
          </p>
        </>
      )}
    </div>
  );
};

export default WeatherWidget;
The aboveWeatherWidget React component fetches weather data from an API based on the provided city or coordinates using useState and useEffect hooks. It dynamically renders weather details, including city name, description, and temperature, with a loading message displayed while data is being fetched. Styled using CSS modules, it ensures a clean and modular structure for presenting weather information in a visually appealing manner.
Setting OpenWeatherMap API Key
You can get 60 calls per minute and 1,000,000 calls per month with OpenWeatherMap's free API tier. Therefore, there is more than enough for this tutorial.
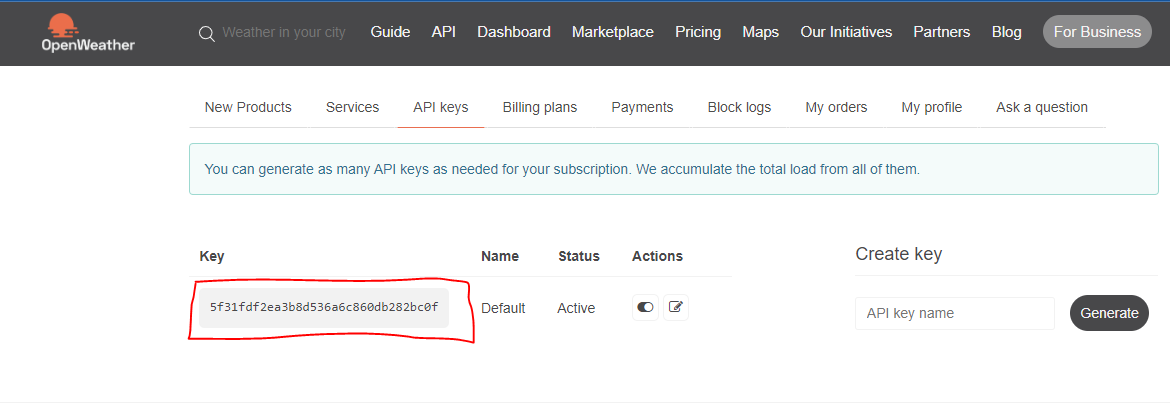
Head over to openweathermap.org and sign up for an account to receive your free key.
After setting up your account:
Copy your API key from the page called API Keys. Add the following code to a new file called **.env.local** in the root folder of your weather widget project. Replace [YOUR_API_KEY_HERE] with the API key you got from OpenWeatherMap:
 # .env.local

   OPENWEATHERMAP_API_KEY=[YOUR_API_KEY_HERE]
Creating weather data API
In thepages/api folder, create a file calledweather.ts, and add the following code:
// pages/api/weather.ts
import type { NextApiRequest, NextApiResponse } from 'next';

const apiKey = process.env.OPENWEATHERMAP_API_KEY;
const apiUrl = 'https://api.openweathermap.org/data/2.5/weather';

export default async function handler(
  req: NextApiRequest,
  res: NextApiResponse
) {
  const { q, lat, lon } = req.query;

  if (!apiKey) {
    res.status(500).json({ error: 'API key not set' });
    return;
  }

  if (!q && (!lat || !lon)) {
    res
      .status(400)
      .json({ error: 'Please provide either city or coordinates.' });
    return;
  }

  try {
    const query = q ? `q=${q}` : `lat=${lat}&lon=${lon}`;
    const response = await fetch(
      `${apiUrl}?${query}&appid=${apiKey}&units=metric`
    );
    const data = await response.json();

    res.status(200).json(data);
  } catch (error: unknown) {
    if (error instanceof Error) {
      res.status(500).json({ error: error.message });
    } else {
      res
        .status(500)
        .json({
          error: error || 'Server error while trying to fetch weather data',
        });
    }
  }
}
This Next.js API route handles requests for weather data from the OpenWeatherMap API. Key aspects:
Import Statements:
Imports the necessary types (
NextApiRequest,NextApiResponse) from Next.js for request and response handling.Retrieves the OpenWeatherMap API key from the local environment file.
Request Handling:
Extracts query parameters (
q,lat,lon) from the incoming request.Validates the presence of the OpenWeatherMap API key and the required parameters, returning appropriate errors if they are missing.
API Call and Response:
Performs an asynchronous API call to OpenWeatherMap based on the provided city name or coordinates.
Handles potential errors using a try-catch block, returning a 500 error to the frontend in case of an issue.
Response to Frontend:
If the API call is successful, it returns the weather data in JSON format with a 200 status.
In case of errors during an API call or validation, it returns relevant error messages and appropriate status codes.
Error Handling:
Ensures robust error handling, distinguishing between environmental configuration issues, missing parameters, and API call failures.
Responds with clear error messages to facilitate debugging and communicates potential issues to the frontend.
Styling the weather widget
Please make a new file in the styles folder and name it weather.module.css. Then, add the following CSS code to it:
.weatherWidget {
  border: 2px solid #4CAF50; /* Green border */
  border-radius: 8px;
  max-width: 300px;
  padding: 15px;
  margin: 15px;
  text-align: center;
  background-color: #f2f2f2; /* Light gray background */
}

.currentWeather {
  margin: 0 auto;
  display: flex;
  flex-direction: column; /* Change to column for a cleaner look */
  justify-content: center;
  align-items: center;
}

.currentWeather div {
  margin-top: 10px; /* Add some spacing between elements */
  font-size: 2rem; /* Adjust font size */
  color: #333; /* Darker text color */
}

.feelsLike {
  font-size: 1rem; /* Adjust font size */
  font-style: italic;
  color: #666; /* Lighter text color */
}

.weather {
  font-weight: normal; /* Remove bold weight */
  color: #4CAF50; /* Green text color */
}
Updating index page
Our new widget will be implemented in the index.tsx page after we update it. Just copy and paste the following code into pages/index.tsx to replace the original boilerplate:
import React from 'react';
import WeatherWidget from '../components/weatherWidget';

const Home: React.FC = () => {
  return (
    <div className="App">
      {/* Example using city name */}
      <WeatherWidget city="Montreal" />

      {/* Example using coordinates */}
      {/* <WeatherWidget coordinates={{ lon: -73.5878, lat: 45.5088 }} /> */}
    </div>
  );
};

export default Home;
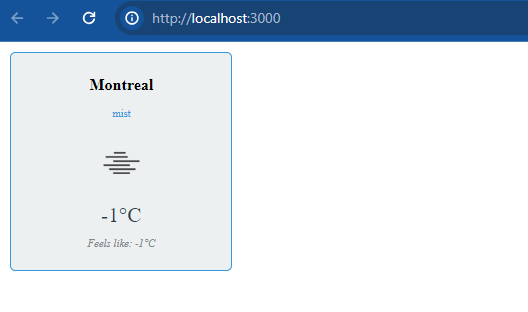
Run the application using the following command and open the link http://localhost:3000 to see it in the browser:
npm run dev
Conclusion
In conclusion, this comprehensive instruction showed how to use Next.js to create a dynamic and attractive weather widget. This guide gives developers a solid foundation to construct a feature-rich component that gets real-time weather data and provides a seamless user experience.
It teaches you how to easily integrate API calls with Next.js API routes after setting up a project and creating the Weather component. State management and useEffect created a responsive, interactive widget by handling data well.


