Installing and Implementing Tailwind CSS on Next.js: A Comprehensive Guide

As a full-stack web developer and technical writer, I bring a unique combination of skills to every project I work on. With experience in both web development and technical writing, I can develop custom solutions that are not only high-performing and user-friendly but also well-documented and easy to maintain. I have expertise in a wide range of programming languages and technologies, including HTML, CSS, JavaScript, React, Node.js, Python, and SQL, as well as technical writing tools and techniques. I am committed to delivering projects on time and within budget while ensuring that the final product meets the unique needs of the client. Let's work together to create something amazing that meets your needs and exceeds your expectations.
Introduction
Tailwind CSS is a popular styling method for developers who value quickness and flexibility. In this detailed article, we examine how Tailwind CSS and Next.js work together to seamlessly integrate utility-first styling concepts into the dynamic framework.
Tailwind CSS, a utility-first CSS framework, offers a strong set of pre-defined utility classes to quickly build and style interfaces. Tailwind simplifies styling with a rich library of utility classes for popular design patterns and a utilitarian and pragmatic approach.
Tailwind CSS combined with Next.js, a powerful React framework for web apps, offers many benefits. From easy setup and configuration to seamless responsive design, this combination gives developers a smooth workflow. This post walks through installing Tailwind CSS in a Next.js project and using its features to improve development.
Explain Next.js
Next.js is a popular open-source React framework for building modern web applications. Developed by Vercel, it simplifies the process of building React-based projects by providing a set of conventions and features for server-side rendering, static site generation, and client-side rendering. Key features of Next.js include automatic code splitting, server-side rendering for React components, efficient routing, and support for API routes. It facilitates a seamless developer experience, offering a balance between performance optimization and ease of use. Next.js is widely adopted for its versatility, enabling developers to build scalable, SEO-friendly, and high-performance web applications.
Setting up the Next.js project
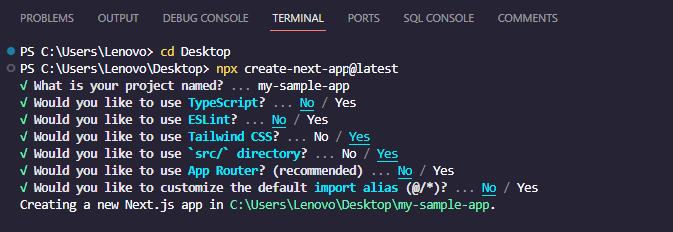
Open VS code, navigate to the desired directory to create an application, and run the following command:
npx create-next-app@latest
It will first ask you to name your app; you can name it my-sample-app. Make sure to configure your project as shown below.
Navigate to the projects directory using the following command: Use the second command to open the projects folder in VS Code.
cd my-sample-app
code .
To begin running your server on the available port on your PC, run any of the commands provided below.
Using npm
npm run dev
Using yarn
yarn dev
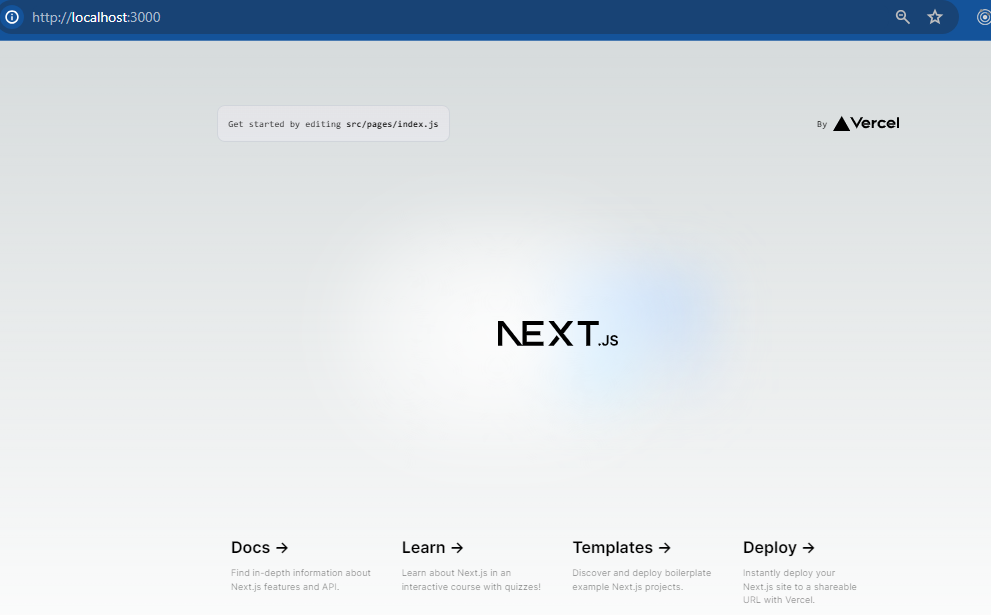
What you should see in your app when you go to the localhost port in your browser is:
Configuration Tailwind css
In this section, we're going to learn how to configure the tailwind.config.js file in different directories.
Using pages directory
This is the expected structure of your tailwind.config.js file when working with the Next.js pages directory:
/** @type {import('tailwindcss').Config} */
module.exports = {
  content: [
    "./pages/**/*.{js,ts,jsx,tsx}",
    "./components/**/*.{js,ts,jsx,tsx}",
  ],
  theme: {
    extend: {},
  },
  plugins: [],
}
Using src directory
Assuming your project's structure has a src folder preceding the pages folder, your tailwind.config.js file needs to resemble the following:
/** @type {import('tailwindcss').Config} */
module.exports = {
  content: [
    "./src/**/*.{js,ts,jsx,tsx}",
  ],
  theme: {
    extend: {},
  },
  plugins: [],
}
Using app directory
In the case of the app directory, the setting of your tailwind.config.js file should resemble this:
/** @type {import('tailwindcss').Config} */
module.exports = {
  content: [
    "./app/**/*.{js,ts,jsx,tsx}",
    "./pages/**/*.{js,ts,jsx,tsx}",
    "./components/**/*.{js,ts,jsx,tsx}",
  ],
  theme: {
    extend: {},
  },
  plugins: [],
}
Last but not least, open the globals.css file in your project's root directory and insert the @tailwind directives for every layer of Tailwind, as illustrated below:
@tailwind base;
@tailwind components;
@tailwind utilities;
Testing
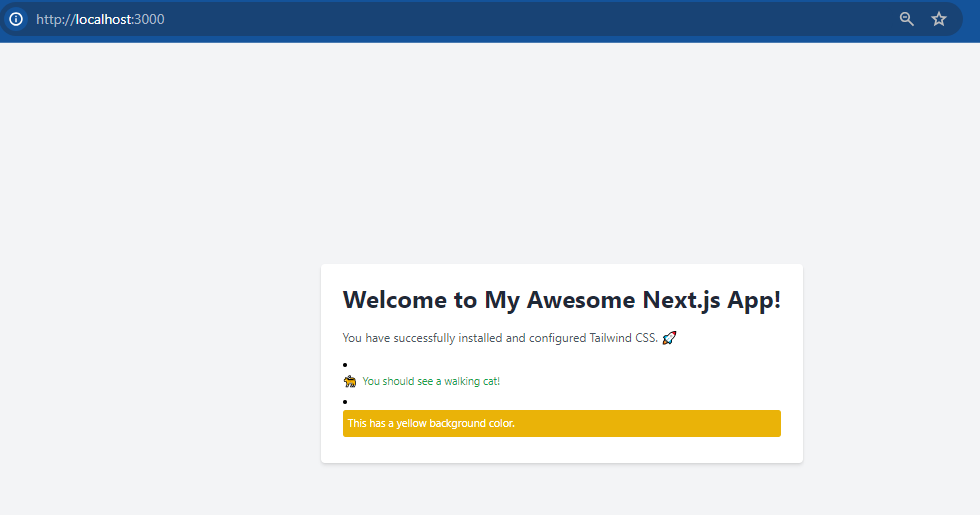
You may check if Tailwind is set up correctly by adding the following code to your index.js file or by using one of the Tailwind utility classes, such as text-red-900 or bg-red-900, in an existing component.
import Head from "next/head";

export default function Home() {
  return (
    <>
      <Head>
        <title>My Awesome Next.js App</title>
        <meta name='description' content='A stylish Next.js app' />
        <meta name='viewport' content='width=device-width, initial-scale=1' />
        <link rel='icon' href='/favicon.ico' />
      </Head>
      <main className='bg-gray-100 min-h-screen flex items-center justify-center'>
        <section className='bg-white p-8 rounded-md shadow-md'>
          <h1 className='text-4xl font-bold text-gray-800 mb-6'>
            Welcome to My Awesome Next.js App!
          </h1>
          <p className='text-lg text-gray-600 mb-4'>
            You have successfully installed and configured Tailwind CSS. 🚀
          </p>
          <ul className='list-disc list-inside'>
            <li className='mb-2'>
              <p className='flex items-center text-green-600'>
                <span className='mr-2'>🐈</span>
                You should see a walking cat!
              </p>
            </li>


            <li className='mb-2'>
              <p className='bg-yellow-500 text-white p-2 rounded'>
                This has a yellow background color.
              </p>
            </li>
          </ul>
        </section>
      </main>
    </>
  );
}
If you've added a utility class to an existing component, your browser should display that class. Otherwise, it will appear like the index.js file:
Conclusion
In wrapping up our exploration of integrating Tailwind CSS with Next.js, let's recap the key steps and fundamental concepts covered in this comprehensive guide. We initiated the process by creating a Next.js project with Tailwind CSS using the npx create-next-app command with the with-tailwindcss example. We then delved into configuring, installing, and seamlessly integrating Tailwind CSS into our Next.js application, embracing its utility-first approach for efficient and modular styling.
Throughout the guide, we explored the significance of Tailwind CSS in modern web development, emphasizing its role in promoting rapid prototyping, consistent design language, and streamlined collaboration. By understanding the importance of Tailwind CSS within the context of Next.js, we unlocked the potential for building scalable, performant, and visually appealing web applications.


